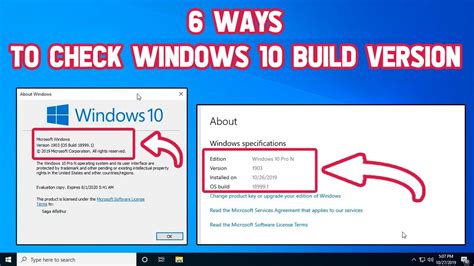
How to Check Windows 10 Build
- Right-click the start menu and choose Run.
- In the Run window, type winver and press OK.
- The window that opens will display the Windows 10 build that is installed.
Windows 10 current versions by servicing option
| Version | Servicing option | Availability date |
|---|
| 1809 | Long-Term Servicing Channel (LTSC) | 2018-11-13 |
| 1607 | Long-Term Servicing Branch (LTSB) | 2016-08-02 |
| 1507 (RTM) | Long-Term Servicing Branch (LTSB) | 2015-07-29 |
Windows 10 – which version is right for you?
- Windows 10 Home. Chances are that this will the be the edition best suited to you.
- Windows 10 Pro. Windows 10 Pro offers all of the same features as the Home edition, and is also designed for PCs, tablets and 2-in-1s.
- Windows 10 Mobile.
- Windows 10 Enterprise.
- Windows 10 Mobile Enterprise.
- Click Start, type system in the search box, and then click System Information in the Programs list.
- When System Summary is selected in the navigation pane, the operating system is displayed as follows:
- For a 64-bit version operating system: X64-based PC appears for the System Type under Item.
The first letter is the code name of the release family, e.g. F is Froyo. The second letter is a branch code that allows Google to identify the exact code branch that the build was made from, and R is by convention the primary release branch. The next letter and two digits are a date code.
How to enable Developer Mode in Windows 10?
- Step 1 - To enable Developer Mode in Windows 10, you will first have to Open Settings.
- Step 2 - Now, you will find the "Update & security" section, click on it.
- Step 3 - There, locate the "For developers" button, then click on the "Developer mode"
EASIEST METHOD:
- Click the Windows Start button and type msinfo32 and press Enter.
- Click View > Remote Computer > Remote Computer on the Network.
- Type machine name and click OK.
Show Your Computer Uptime Using CMD
- Also, you can get the uptime value using the built-in statistics of any system service that has been working non-stop since the system booted.
- Ad.
- To get uptime from a remote server/computer, use this command: wmic /node:"lon-man01" os get lastbootuptime.
Using the Command Prompt
- Log in to your Active Directory Domain Controller.
- Click Start Menu, right-click Command Prompt, hover over More, and click Run as administrator.
- Run the command dsquery * cn=schema,cn=configuration,dc=<your_domain_name>,dc=<your_domain_suffix> -scope base -attr objectVersion.
To find out which version of Windows your device is running, press the Windows logo key + R, type winver in the Open box, and then select OK. Open RUN and type WINVER and press enter. Simple. Also msinfo32 gives the (and much more) information about OS, but visually winver is better.
Windows 10 Version Numbers with Number of Build Versions
| Windows 10Version | Windows 10Build | Count of KBs/ Build Versions |
|---|
| Windows 10 version 1809 | 17763 | 8.. |
| Windows 10 version 1803 | 17134 | 20 |
| Windows 10 version 1709 | 16299 | 33 |
| Windows 10 version 1703 | 15063 | 43 |
Method 1: Making Sure that the RPC Services are Properly Functioning
- On your keyboard, press Windows Key +R.
- When you see the Run dialog box, type “services.
- Look for the items named DCOM Server Process Launcher, Remote Procedure Call (RPC), and RPC Endpoint Mapper.
- To get the Windows version number, as Jeff notes in his answer, use: [Environment]::OSVersion.
- Use WMI's Win32_OperatingSystem class (always single instance), for example: (Get-WmiObject -class Win32_OperatingSystem).Caption.
Winver is a command that displays the version of Windows that is running, the build number and what service packs are installed: Click Start – RUN , type “winver” and press enter. If RUN is not available, the PC is running Windows 7 or later. Type "winver" in the "search programs and files" textbox.
How to check your PowerShell version
- Press Windows key + R to open up a Run command. Then, type “powershell” and press Enter to open a new PowerShell prompt.
- In the newly opened Powershell window, type the command below and hit Enter: $PSversionTable.
- You will see a list of details related to your PowerShell utility.
To check your PC hardware specs, click on the Windows Start button, then click on Settings (the gear icon). In the Settings menu, click on System. Scroll down and click on About. On this screen, you should see specs for your processor, Memory (RAM), and other system info, including Windows version.
Open it and run this command: Get-WmiObject win32_processor | Select-Object -Property Name, MaxClockSpeed, CurrentClockSpeed. The output should tell you the name of your CPU, as well as its maximum and current speeds.
Find detailed specs in System Information
- Click Start and type "system information."
- Click "System Information" in the search results.
- You can find most of the details you need on the first page, in the System Summary node.
- To see details about your video card, click "Components" and then click "Display."
Abbreviation for command, cmd is a Microsoft Windows command that opens the Windows command line window. Note. Windows 95 and 98 users can only enter the command line by entering command. All other Windows users can enter using command or cmd.
You can open the Command Prompt by pressing ⊞ Win + R to open the Run box and typing cmd . Windows 8 users can also press ⊞ Win + X and select Command Prompt from the menu. Type help , followed by the command.
How can I find out which graphics card I have in my PC?
- Click Start.
- On the Start menu, click Run.
- In the Open box, type "dxdiag" (without the quotation marks), and then click OK.
- The DirectX Diagnostic Tool opens. Click the Display tab.
- On the Display tab, information about your graphics card is shown in the Device section.
Method 1: Use the set commandTo use the set command to determine the processor type, follow these steps: Click Start, click Run, type cmd in the Open box, and then press ENTER. At the command prompt, type set, and then press ENTER. Note the string that is displayed next to PROCESSOR_IDENTIFIER.
The partitions are shown with their drive letters in the top window. While in the Disk Management console right click on the partition and select Properties or Explore and you should be able to figure out which is which.
Simple, the Windows operating system is always the C: drive, just look at the size of the C: drive and if it is the size of the SSD then you are booting from the SSD, if it is the size of the hard drive then it is the hard drive.
Right-click My Computer and choose Manage. Then go to Disk Management. You will see the list of hard drives and the partitions on each. The partition with the System flag is the partition on which Windows is installed.
To access your BIOS, you'll need to press a key during the boot-up process. This key is often displayed during the boot process with a message “Press F2 to access BIOS”, “Press <DEL> to enter setup”, or something similar. Common keys you may need to press include Delete, F1, F2, and Escape.
From the command prompt, type diskpart and press Enter. The diskpart prompt will open. From the diskpart prompt, type list disk and press Enter. A list of disks will appear in a text format.